At Pellpax, we work hard to ensure our staff expertise is some of the best in the industry, so they can provide excellent customer service. We believe training is vital.
That’s why, in April this year, Pellpax sent three of the archery shop sales team – James Hancock, Chris Roberts, and Jake Kirk – to Eaton Vale Scout and Guide Activity Centre in Norwich to take the Archery GB Instructor Course. It was led by highly knowledgeable official Archery GB instructors Andrew Hood and Abbie Stewardson. Blogger and writer Hazel Randall joined them to participate and observe proceedings….
I was delighted to be included in the event. Everyone on the Archery GB Instructor course was there to learn how to teach archery to a group of beginners. The instructor, Andrew Hood, demonstrated a beginners’ session.
Andy is not only an excellent archer – he’s a first-class teacher. Understanding that experience shapes the way we perceive and interpret the world, Andy adapts his sessions to the needs and ability of each student. His instruction has a fluid quality that reaches the most distant individual.
Introduction
Andy introduced himself – name and credentials – and asked for the names of all the students. He told us that the aim of the session was to learn how to shoot. We were asked if we had any medical conditions that might affect our shooting. “You don’t need to shout it out,” Andy told us. “Just come and tell me privately.”
Andy then asked the students about archery experience. If a student has had a go before, then preconceived knowledge and learnt behaviour may affect their ability to follow instructions. In this case, particularly, experienced performance shooters posed the greatest challenge. This course was not about shooting well – it was about learning (or relearning) each minute step of archery protocol as set out by Archery GB.
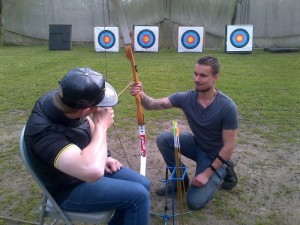
Our own James Hancock, holder of many shooting titles, had the difficult task of temporarily shedding his ingrained, automatic habits in order to adopt new sequences. James told me that many

aspects of this course were enlightening, in that he became aware of details that needed to be explained to beginners – details so familiar to James that he was unaware of their importance to a novice.
It is important that an instructor fully understands every aspect of the activity – far more than he will ever share with his students. Andy told us what we needed to know, when we needed to know it. He didn’t overload us with information, and he repeated each point clearly.
After the introduction, everyone trooped from the classroom to the archery range. As he gathered his equipment together and pottered into the sunshine, Andy whistled softly to himself. By the time we were all gathered together, two other people were humming or whistling that same tune. His natural charisma and leadership were infectious. This happened on two other occasions, and when I mentioned it to Andy, he said, “You see how easily people are influenced by what they hear; they probably don’t even know they’ve heard it.”
The waiting line
Andy told us that the waiting line is a rope stretched across the range, parallel to the targets. Its purpose is safety. The rule is: don’t cross the line until your instructor invites you to do so. If you cross the line once, you receive a warning. If you cross it a second time, it’s an early bath!
Tell students what to do – don’t tell them what not to do
Andy explained: “Running on the archery range is strictly forbidden. So don’t run makes sense – until your students are hopping, skipping, and jumping all over the place, and your life suddenly becomes a nightmare of blood, death, and paperwork. The correct way to move around on an archery range is to walk. So the best instruction to give students is: walk.”
The bracer
A bracer protects the shooter’s inner forearm from the bowstring. The word bracer is probably unfamiliar to young children, and easily forgotten. The term arm guard carries overtones of danger and pain – why else would you need a guard? So Andy referred to the bracer as an arm thingy; it’s just a thing you put on your arm.
We were asked to hold up the hand we write with (remember that these sessions are designed for children), and a bracer was put into our dominant hand. We were shown how to put the bracer onto the opposite arm (the one that holds the bow). To check that we were wearing the bracer on the correct arm, we were asked to raise our dominant hand again, to check that no bracer was being worn on this arm. (In case you’re wondering – yes, there was at least one!)
Arrow length check
Arrow length is an important safety check. It is safest for everyone to use long arrows, avoiding the possibility of somebody tall using an arrow that is too short.
A person’s arm span is virtually equal to his own height. So a tall person will have a longer arm span than a short person. When an archer draws back his bowstring, the longer his arms, the further back the string (and arrow) will go. So if the arrow is not long enough, it will be drawn back beyond the riser (middle section of the bow). There have been some very nasty accidents involving pierced hands and arms, caused by using short arrows.
The shooting line
When students are introduced to the shooting line, understanding the rules is crucial for safety. Students might be told: stand behind the line. But what does this mean?
It might mean, stand anywhere behind the line. But if a student shoots from a couple of feet behind the line, others – who are standing forward of the shooter but behind the line – would be in danger. Stand behind the line might mean, put your toes on the line and face the target. In this case, an extra lesson must be taught in taking up the correct position.
Although the idea of the shooting line is to be behind it, Andy finds that the clearest and safest way to teach this element of archery protocol is to instruct students to stand with feet parallel, one either side of the shooting line, the arm-brace arm towards the target. It is made clear that only one foot is over the line and that equipment is not to be handled until you are in this position.
This choice of words results in a steady stance, a safe shooting position, and elimination of the risk that a student will wander around with equipment or step over the shooting line.
The STOP command
The STOP command is for potentially catastrophic situations. Anybody on the archery range can call it, and the command must be acted upon immediately. If an archer is at full draw when the STOP command is given, he must abort that shot. The first step is to point the drawn arrow at the ground in front of you. At this point the string tension must be released.
The terms release or let go may suggest following through with the shot, firing the arrow into the ground. But push the arrow forward describes the controlled manner in which an archer should keep hold of the arrow and slowly ease the string tension until bow and arrow are held separately, at which point they can be returned to bow stand and quiver.
Demonstration
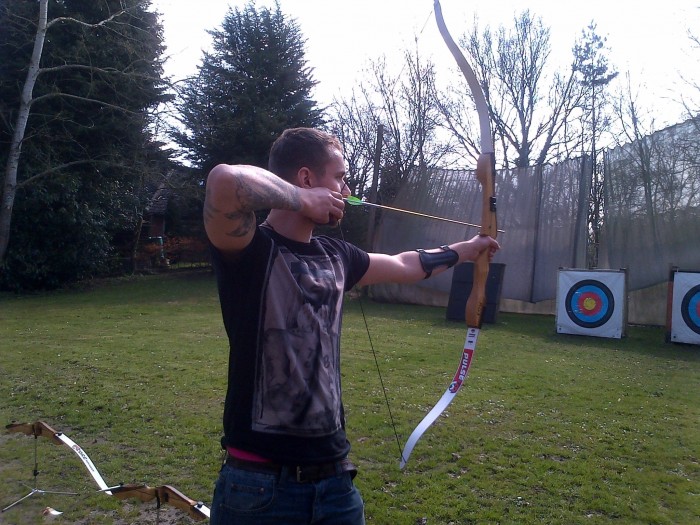
Standing in the correct position, Andy picked up the bow and an arrow. Holding the bow in front of him, and keeping the arrowhead facing the archery target (i.e. away from everybody), he slid the arrow up the right side of the bow, over the top, and down the left side of the bow. A left-handed archer will do this the opposite way round (left to right).
He then fitted the nock onto the bowstring between the nocking points, and with three fingers (fore, middle, and ring) underneath the arrow, drew the string back until his forefinger touched the
corner of his mouth. He aimed and fired. This demonstration was done with commentary. Andy went through the process again, but without speaking. Our visual learning was now brought to the fore. Andy explained the power of visual experience by suggesting a scenario.
“Children are passing by the archery range en route to a canoeing lesson, and they happen to witness an archer walking straight from the shooting line to the target in order to retrieve his arrows. The children don’t really register what they see – they’re thinking about canoeing. But they’ve seen it; the memory is made.”
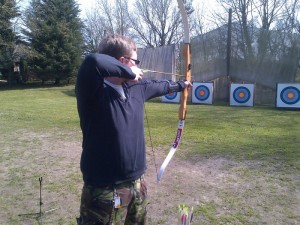
Guided shoot
Individually, we were guided through the shooting of three arrows. Physical guidance can be valuable in teaching. Having limbs put into position and torso turned at the right angle can give the nervous system a head start in the learning of new moves.
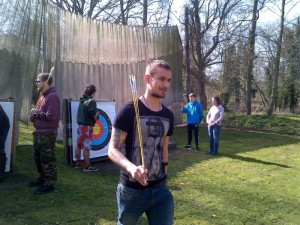
Retrieval of arrows
Following the instructor, we filed round the edge of the range to the targets. When you extract an arrow from the archery target, you need to consider three things. One: do minimum damage to the fabric of the target. Two: reduce the risk of losing the piles (arrow tips). Three: don’t stab anyone.
Andy placed a hand flat on the target, with the arrow between forefinger and middle finger (“or middle finger and ring finger if that’s more comfortable”), looked behind him, and pressed against the target as he drew the arrow out. This method of retrieval protects the target from tearing, and if the pile has come free of the arrow, you’ll find it wedged between your fingers. Looking behind you, of course, will prevent you from stabbing anybody!
After pulling our arrows from the archery target (or picking them up from behind it), we walked straight back to the shooting line (across the range), the arrows held in one hand, resting over a shoulder. There followed a period of free shooting. Andy asked us questions that tested our memories of what we’d learnt. There followed a review of the session from a teaching point of view.
Open and closed questions
Andy talked to us about open and closed questions. “Ask a group of kids, did you enjoy the session? and you know that the answer will be yes. Children know that’s what you expect to hear; they know that’s what their peers will say; they know there’ll be some sort of fuss or attention or adult fretting if the answer’s no.
But questions like what did you enjoy about the session? / what did you find difficult? / why did we teach you about the waiting line and the shooting line? produce thought-driven answers. Just as an ill-chosen phrase can give wrong (or ambiguous) information, so a badly worded question can smother real communication in pointless platitudes.”
Be specific
Andy demonstrated the importance of choosing apt vocabulary. We were asked to hold up our hands at face level, palms facing each other, a head width apart. Then we were asked to close our eyes and move our hands apart a little bit. When eyes were opened, it was obvious that interpretations of a little bit varied hugely – from less than a centimetre to about fifteen centimetres.
Presentation
Andy spoke at an even pitch and speed, and his delivery was clear and audible. He never conveyed impatience or stress or haste. Certain phrases were repeated several times over, allowing students to grasp new facts that might otherwise have skimmed over our consciousness like a miss-fired arrow. The day was enjoyed by all of the Pellpax team, and we all felt we had developed a knowledge of how to guide and instruct young archers taking their first steps.
You can also learn how to learn shoot a recurve bow with the help of our very own Jason Whittle, in another post on this very blog.