How to Get Into Archery for Beginners

James from the Pellpax team takes aim

This summer will see many new enthusiasts for the sport of archery, so if you’ve discovered a newfound passion for this activity, then read on to find out how you can get involved….

All forms of archery in the UK are under governance of ArcheryGB, which is affiliated to the World Archery Federation – formerly FITA (Fédération Internationale de Tir à l’Arc) and is a member of the British Olympic Association. The very first archery society was founded in 1537, under the direction of Henry VIII, and by the 1600s, archery was established as a competitive sport.

Archery GB

Contacting Archery GB (http://www.archerygb.org) is a good first step to learning archery. The website provides information about clubs, competitions, and courses. You don’t have to be a member of Archery GB to take part in the sport, but there are advantages. As a member, you are eligible to enter its regional and national tournaments and to attend its training courses (although not all of the courses are exclusive to members). There is also subscription to a quarterly magazine, Archery UK.

Field Archery

Field archery involves an exciting trek through woodland and open countryside, shooting at a series of archery targets from designated positions. These targets can be flat or three dimensional, upright or tilted, small or large, and at short or long distances. The archer might be shooting among trees, on a slope, across a pond, or from a gulley – you could be shooting from rocky or muddy terrain, in rain or wind, bright sunlight or semi-darkness.

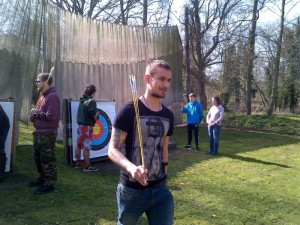
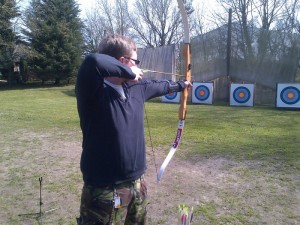
Outdoor Target Archery

This is the most popular discipline in the UK. Archers shoot at circular, colour-coded targets – each colour representing two scores. The white (outer) ring is one and two, the black, three and four, the blue, five and six, the red, seven and eight, and the gold (centre) ring is nine and ten; the bullseye (10) is 2cm in diameter. Outdoor archery targets are at distances ranging from 40 yards (37m) to

A bow and arrow
A bow and arrow

100 yards (91m) for seniors, and from ten yards (9m) to 80 yards (73m) for juniors. In a competition, each archer will shoot ten ends of six arrows, thereby shooting 60 arrows in all. The maximum score for an end is 60 points.

Indoor Target Archery

Indoor target archery is popular during the winter months. Archers shoot at a standard ten-ring target at a distance of 20 yards (18m). Like outdoor archery, both recurve and compound bows are used for the indoor sport.

Flight Archery

Flight Archery – a rare sport in the UK – is about shooting your arrows as far as you can. The obvious problem with this sport is that there are so few places it can be played. A target is, by definition, a stop for a potentially lethal projectile. It’s a challenge to find a suitable venue for flight archery!

Archery in Schools

Archery GB is working in conjunction with School Games to introduce schoolchildren to archery, offering opportunities for intra- and inter-school competition. For dedicated youngsters, there is even the chance of competing on a national level. “We believe that by supporting schools and their networks to deliver the School Games, more young people will also be introduced to archery and enjoy further opportunities through clubs.” Archery GB.

Archery GB Courses

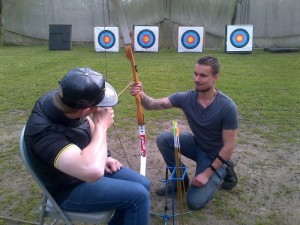
When you join an archery club as a novice, you will likely be required to take part in a beginners’ course consisting of four to six introductory lessons, delivered by a qualified coach. The club’s Archery GB insurance covers new members for the first six lessons that they receive at the club, but after that, if you choose to continue with archery, you will need to join the club or Archery GB. Many people, of course, join both.

The Archery GB Instructor Award is designed for people working in educational environments, and for those who work in recreation and leisure. This basic, entry-level course focusses on training both experienced and novice archers to deliver safe and enjoyable introductory archery sessions.

Level 1 Award in Coaching Archery trains an archer to deliver a course for beginners and includes 12 hours’ supported practice (coaching at your own club, for example) and an assessment delivered over a 12-week period.

Level 2 Award in Coaching Archery is for Archery GB Level 1 coaches. This course teaches participants to deliver a club coaching programme, take responsibility for beginners’ courses, prepare archers for their first competitions, and to manage, mentor and support Level 1 coaches.

Archery Equipment

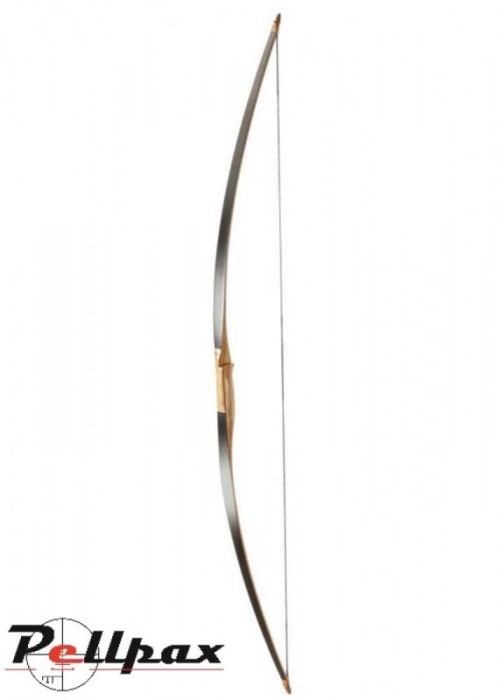
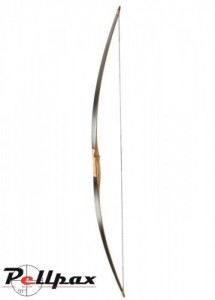
The oldest form of bow is the longbow, and it is still a favourite of many archers today. From about 3500 BC, the longbow was established as the Egyptians’ primary weapon of war. In the 13th and 14th centuries, longbow-men were the core of the English Army, but during the 16th century, the invention of firearms meant the decline of the bow and arrow as a war weapon.

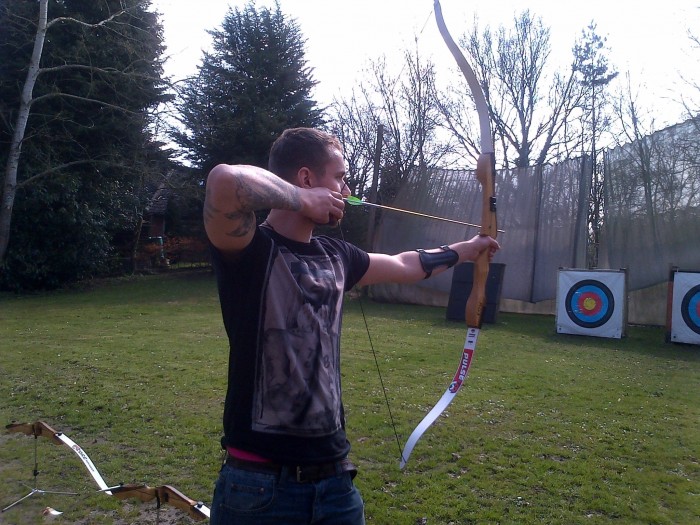
The recurve bow is the most popular kind of bow, and the only form to be used in most world archery competitions. It’s essentially a bow with limbs that curve away from the archer when unstrung. It was invented by the Assyrians in about 1800 BC – the early models being made of wood, horn, and leather. Shorter than a longbow, the recurve bow proved to be a handy weapon to use whilst racing around in chariots. At Pellpax, we have a wide range of recurve bows and accessories in our archery shop.

Another popular type of the bow is the compound bow, which was first developed by an American, Holless Wilbur Allen, in 1966. Working on a pulley / cam system, the bow provides a mechanical advantage to the archer, allowing the limbs of the bow to be more rigid and therefore more energy efficient than those of the longbow or recurve bow. At Pellpax, we have a wide range of compound bows and accessories.

Meanwhile, the crossbow – a short bow mounted on a stock – originated in China during the sixth century BC. The projectiles are called bolts (or quarrels), fired from a string which is released by a trigger. The crossbow is a silent, powerful, and accurate hunting tool (outside of the UK), as well as a popular discipline within competitive archery. At Pellpax, we have a wide range of crossbows for sale and accessories, which you can check out here.

Head to the ArcheryGB website to learn more about archery. Or check out our extensive range of crossbows for sale, archery accessories and other goods in our archery shop

Pellpax go Archery Instructor Training with Archery GB

At Pellpax, we work hard to ensure our staff expertise is some of the best in the industry, so they can provide excellent customer service. We believe training is vital.

Our very own James carrying arrows back from the target.
Our very own James Hancock carrying arrows back from the target.

That’s why, in April this year, Pellpax sent three of the archery shop sales team – James Hancock, Chris Roberts, and Jake Kirk – to Eaton Vale Scout and Guide Activity Centre in Norwich to take the Archery GB Instructor Course. It was led by highly knowledgeable official Archery GB instructors Andrew Hood and Abbie Stewardson. Blogger and writer Hazel Randall joined them to participate and observe proceedings….

I was delighted to be included in the event. Everyone on the Archery GB Instructor course was there to learn how to teach archery to a group of beginners. The instructor, Andrew Hood, demonstrated a beginners’ session.

Andy is not only an excellent archer – he’s a first-class teacher. Understanding that experience shapes the way we perceive and interpret the world, Andy adapts his sessions to the needs and ability of each student. His instruction has a fluid quality that reaches the most distant individual.

Introduction

Andy introduced himself – name and credentials – and asked for the names of all the students. He told us that the aim of the session was to learn how to shoot. We were asked if we had any medical conditions that might affect our shooting. “You don’t need to shout it out,” Andy told us. “Just come and tell me privately.”

Andy then asked the students about archery experience. If a student has had a go before, then preconceived knowledge and learnt behaviour may affect their ability to follow instructions. In this case, particularly, experienced performance shooters posed the greatest challenge. This course was not about shooting well – it was about learning (or relearning) each minute step of archery protocol as set out by Archery GB.

Our own James Hancock, holder of many shooting titles, had the difficult task of temporarily shedding his ingrained, automatic habits in order to adopt new sequences. James told me that many

James takes aim
James takes aim

aspects of this course were enlightening, in that he became aware of details that needed to be explained to beginners – details so familiar to James that he was unaware of their importance to a novice.

It is important that an instructor fully understands every aspect of the activity – far more than he will ever share with his students. Andy told us what we needed to know, when we needed to know it. He didn’t overload us with information, and he repeated each point clearly.

After the introduction, everyone trooped from the classroom to the archery range. As he gathered his equipment together and pottered into the sunshine, Andy whistled softly to himself. By the time we were all gathered together, two other people were humming or whistling that same tune. His natural charisma and leadership were infectious. This happened on two other occasions, and when I mentioned it to Andy, he said, “You see how easily people are influenced by what they hear; they probably don’t even know they’ve heard it.”    

The waiting line

Andy told us that the waiting line is a rope stretched across the range, parallel to the targets. Its purpose is safety. The rule is: don’t cross the line until your instructor invites you to do so. If you cross the line once, you receive a warning. If you cross it a second time, it’s an early bath!

Tell students what to do – don’t tell them what not to do

Andy explained: “Running on the archery range is strictly forbidden. So don’t run makes sense – until your students are hopping, skipping, and jumping all over the place, and your life suddenly becomes a nightmare of blood, death, and paperwork. The correct way to move around on an archery range is to walk. So the best instruction to give students is: walk.”

Chris shooting 1
Chris Roberts from the Pellpax team takes aim at archery targets

The bracer

A bracer protects the shooter’s inner forearm from the bowstring. The word bracer is probably unfamiliar to young children, and easily forgotten. The term arm guard carries overtones of danger and pain – why else would you need a guard? So Andy referred to the bracer as an arm thingy; it’s just a thing you put on your arm.

We were asked to hold up the hand we write with (remember that these sessions are designed for children), and a bracer was put into our dominant hand. We were shown how to put the bracer onto the opposite arm (the one that holds the bow). To check that we were wearing the bracer on the correct arm, we were asked to raise our dominant hand again, to check that no bracer was being worn on this arm. (In case you’re wondering – yes, there was at least one!)

Arrow length check

Arrow length is an important safety check. It is safest for everyone to use long arrows, avoiding the possibility of somebody tall using an arrow that is too short.

Arrow length Pellpax boys
The Pellpax archery team learning about arrow length

A person’s arm span is virtually equal to his own height. So a tall person will have a longer arm span than a short person. When an archer draws back his bowstring, the longer his arms, the further back the string (and arrow) will go. So if the arrow is not long enough, it will be drawn back beyond the riser (middle section of the bow). There have been some very nasty accidents involving pierced hands and arms, caused by using short arrows.

The shooting line

When students are introduced to the shooting line, understanding the rules is crucial for safety. Students might be told: stand behind the line. But what does this mean?

It might mean, stand anywhere behind the line. But if a student shoots from a couple of feet behind the line, others – who are standing forward of the shooter but behind the line – would be in danger. Stand behind the line might mean, put your toes on the line and face the target. In this case, an extra lesson must be taught in taking up the correct position.

Although the idea of the shooting line is to be behind it, Andy finds that the clearest and safest way to teach this element of archery protocol is to instruct students to stand with feet parallel, one either side of the shooting line, the arm-brace arm towards the target. It is made clear that only one foot is over the line and that equipment is not to be handled until you are in this position.

This choice of words results in a steady stance, a safe shooting position, and elimination of the risk that a student will wander around with equipment or step over the shooting line.

Wheelchair Jake 2
Jake Kirk from Pellpax takes aim.

The STOP command

The STOP command is for potentially catastrophic situations. Anybody on the archery range can call it, and the command must be acted upon immediately. If an archer is at full draw when the STOP command is given, he must abort that shot. The first step is to point the drawn arrow at the ground in front of you. At this point the string tension must be released.

The terms release or let go may suggest following through with the shot, firing the arrow into the ground. But push the arrow forward describes the controlled manner in which an archer should keep hold of the arrow and slowly ease the string tension until bow and arrow are held separately, at which point they can be returned to bow stand and quiver.

Demonstration

Standing in the correct position, Andy picked up the bow and an arrow. Holding the bow in front of him, and keeping the arrowhead facing the archery target (i.e. away from everybody), he slid the arrow up the right side of the bow, over the top, and down the left side of the bow. A left-handed archer will do this the opposite way round (left to right).

He then fitted the nock onto the bowstring between the nocking points, and with three fingers (fore, middle, and ring) underneath the arrow, drew the string back until his forefinger touched the

An Arrow between nocking points.

corner of his mouth. He aimed and fired. This demonstration was done with commentary. Andy went through the process again, but without speaking. Our visual learning was now brought to the fore. Andy explained the power of visual experience by suggesting a scenario.

“Children are passing by the archery range en route to a canoeing lesson, and they happen to witness an archer walking straight from the shooting line to the target in order to retrieve his arrows. The children don’t really register what they see – they’re thinking about canoeing. But they’ve seen it; the memory is made.”

Guided shoot

Individually, we were guided through the shooting of three arrows. Physical guidance can be valuable in teaching. Having limbs put into position and torso turned at the right angle can give the nervous system a head start in the learning of new moves.

Retrieval of arrows

Following the instructor, we filed round the edge of the range to the targets. When you extract an arrow from the archery target, you need to consider three things. One: do minimum damage to the fabric of the target. Two: reduce the risk of losing the piles (arrow tips). Three: don’t stab anyone.

Andy placed a hand flat on the target, with the arrow between forefinger and middle finger (“or middle finger and ring finger if that’s more comfortable”), looked behind him, and pressed against the target as he drew the arrow out. This method of retrieval protects the target from tearing, and if the pile has come free of the arrow, you’ll find it wedged between your fingers. Looking behind you, of course, will prevent you from stabbing anybody!

After pulling our arrows from the archery target (or picking them up from behind it), we walked straight back to the shooting line (across the range), the arrows held in one hand, resting over a shoulder. There followed a period of free shooting. Andy asked us questions that tested our memories of what we’d learnt. There followed a review of the session from a teaching point of view.

Open and closed questions

Andy talked to us about open and closed questions. “Ask a group of kids, did you enjoy the session? and you know that the answer will be yes. Children know that’s what you expect to hear; they know that’s what their peers will say; they know there’ll be some sort of fuss or attention or adult fretting if the answer’s no.

But questions like what did you enjoy about the session? / what did you find difficult? / why did we teach you about the waiting line and the shooting line? produce thought-driven answers. Just as an ill-chosen phrase can give wrong (or ambiguous) information, so a badly worded question can smother real communication in pointless platitudes.”

Be specific

Andy demonstrated the importance of choosing apt vocabulary. We were asked to hold up our hands at face level, palms facing each other, a head width apart. Then we were asked to close our eyes and move our hands apart a little bit. When eyes were opened, it was obvious that interpretations of a little bit varied hugely – from less than a centimetre to about fifteen centimetres.

Presentation

Andy spoke at an even pitch and speed, and his delivery was clear and audible. He never conveyed impatience or stress or haste. Certain phrases were repeated several times over, allowing students to grasp new facts that might otherwise have skimmed over our consciousness like a miss-fired arrow. The day was enjoyed by all of the Pellpax team, and we all felt we had developed a knowledge of how to guide and instruct young archers taking their first steps.

To check out our full range of archery supplies and accessories, check out our archery shop, where we sell everything from recurve bows to crossbows, arrows, targets and quivers.

You can also learn how to learn shoot a recurve bow with the help of our very own Jason Whittle, in another post on this very blog.

Review: Buck Trail Blackhawk Recurve Bow

Our resident archery expert James Hancock gives his verdict on the Buck Trail Blackhawk….

From personal experience of these bows, having shot both the 30# and 40# versions, it is clear to me that the Buck Trail Blackhawk represents true value for money, and I can highly recommend them to any archer who enjoys traditional shooting at a very affordable price.

Long & Fast

The Buck Trail Blackhawk is an American style Flatbow made by Raven Archery. The overall length of the bow is a huge 68 inches, and this provides the shooter with a very long and smooth draw, which delivers an arrow to the target with great speed, but little hand-shock.

It is designed to be shot off the shelf, using either a leather pad or hair rest, and constructed from multiple wooden laminations, with clear glass over the limbs. This is in keeping with the traditional look of the bow.

My personal opinion on shooting this bow would be to use a style of shooting called “canting the bow”. This is where the shooter leans the bow so that the arrow is sitting on an almost “v” shape. This is a great technique, used by many bare bow archers because it is a quick way of moving the bow out of the archers line of sight, so he may line up the shot, as well as adding stability to the arrow and making it a lot easier to shoot the arrows quickly (snap shooting).

Available in Different Configurations

Available in both left and right handed and with a draw weight range from 30-50# this is a versatile bow which can be used for everything from field archery competitions, to hunting (as appropriate according to the law in your country). I think the draw weights around the 50# mark are much better to use, providing you are able to draw these, since the arch of the arrow isn’t as much as the weaker powered bows. This is because the higher the power, the flatter the trajectory of the arrow, which will make your shooting a lot more accurate than a bow which you have to aim well above the target at longer ranges.

buck-trail-blackhawk-1289
The Buck Trail Blackhawk, a versatile recurve bow

Arrow Selection

The best arrows to be shot with this style of bows to maintain its accuracy and smoothness would either be wooden or aluminium arrows.  My personal preference would be wooden arrows with feathers on them rather than plastic vanes, but an aluminium arrow would shoot well from these as well. Carbon arrows can be quite unforgiving to shoot due to their lightness and speed which is why they are better suited to more precision shooting such as with a recurve or compound with sights.

Personally I would make my own wooden arrows because there is great satisfaction when you have put in the time and effort into making something which looks quite often better than those you can just buy, and they shoot great! At Pellpax we can supply all the materials you will need to build your arrows from the wooden shafts themselves to the arrow points and feathers.

Essential Bow Accessories

A few more things to consider when purchasing this bow. There are certain accessories every archer will need to get at some point such as finger protection from the string, an arm guard again to protect you from the string, and a quiver to hold your arrows for you whilst you are shooting.

I would personally suggest that any beginner archer should use an arm guard until you have worked out a good enough technique to not need one (although the string can still catch you!). I don’t really like using arm guards, as I find if the string hits me then it’s a tough reminder that my technique is flawed, and I need to bend my arm more.

My personal equipment preference would be to keep with the traditional theme, and get a leather shooting glove rather than a tab. This is because they not only protect your fingers, but keep your hand warm when winter shooting, are easy to use, and they look great.

In terms of a quiver, I love to use a back quiver, much like you see in every Hollywood film where there is a bit of archery. Many people struggle to get their head around how to use one of these and end up chasing around after their arrows like a cat after their tail, so for beginners it may be better to go for a side quiver instead, which can simply click onto any belt.

In conclusion, found the Buck Trail Blackhawk to be excellent value, due to its sheer quality, and I would recommend it as great bow for entry level and intermediate archers.

If you would like to see our range arrows click here, and for arrow building materials click hereA lot more arrow-making supplies are available, so if you have anything in mind which you particularly need and cannot see on here, then please feel free to contact one of our staff and raise your enquiry.

We sell the Buck Trail Blackhawk, in a variety of configurations, at the low price of £112.99.  They can be found here. 

For all items suggested above, you can go to the head to the Archery Accessories section. And you can browse our entire catalogue, in our archery shop.